
How to Cure Egg Yolks: A Traditional Method for Preserving and Elevating Flavor
Egg yolks are one of nature’s most nutrient-dense foods, packed with essential vitamins, healthy fats, and bioavailable protein. They contain choline, which supports brain health, along with fat-soluble vitamins like A, D, E, and K. While a future post will dive deeper into their impressive nutritional profile, today we’re focusing on a centuries-old method of preserving them—curing.
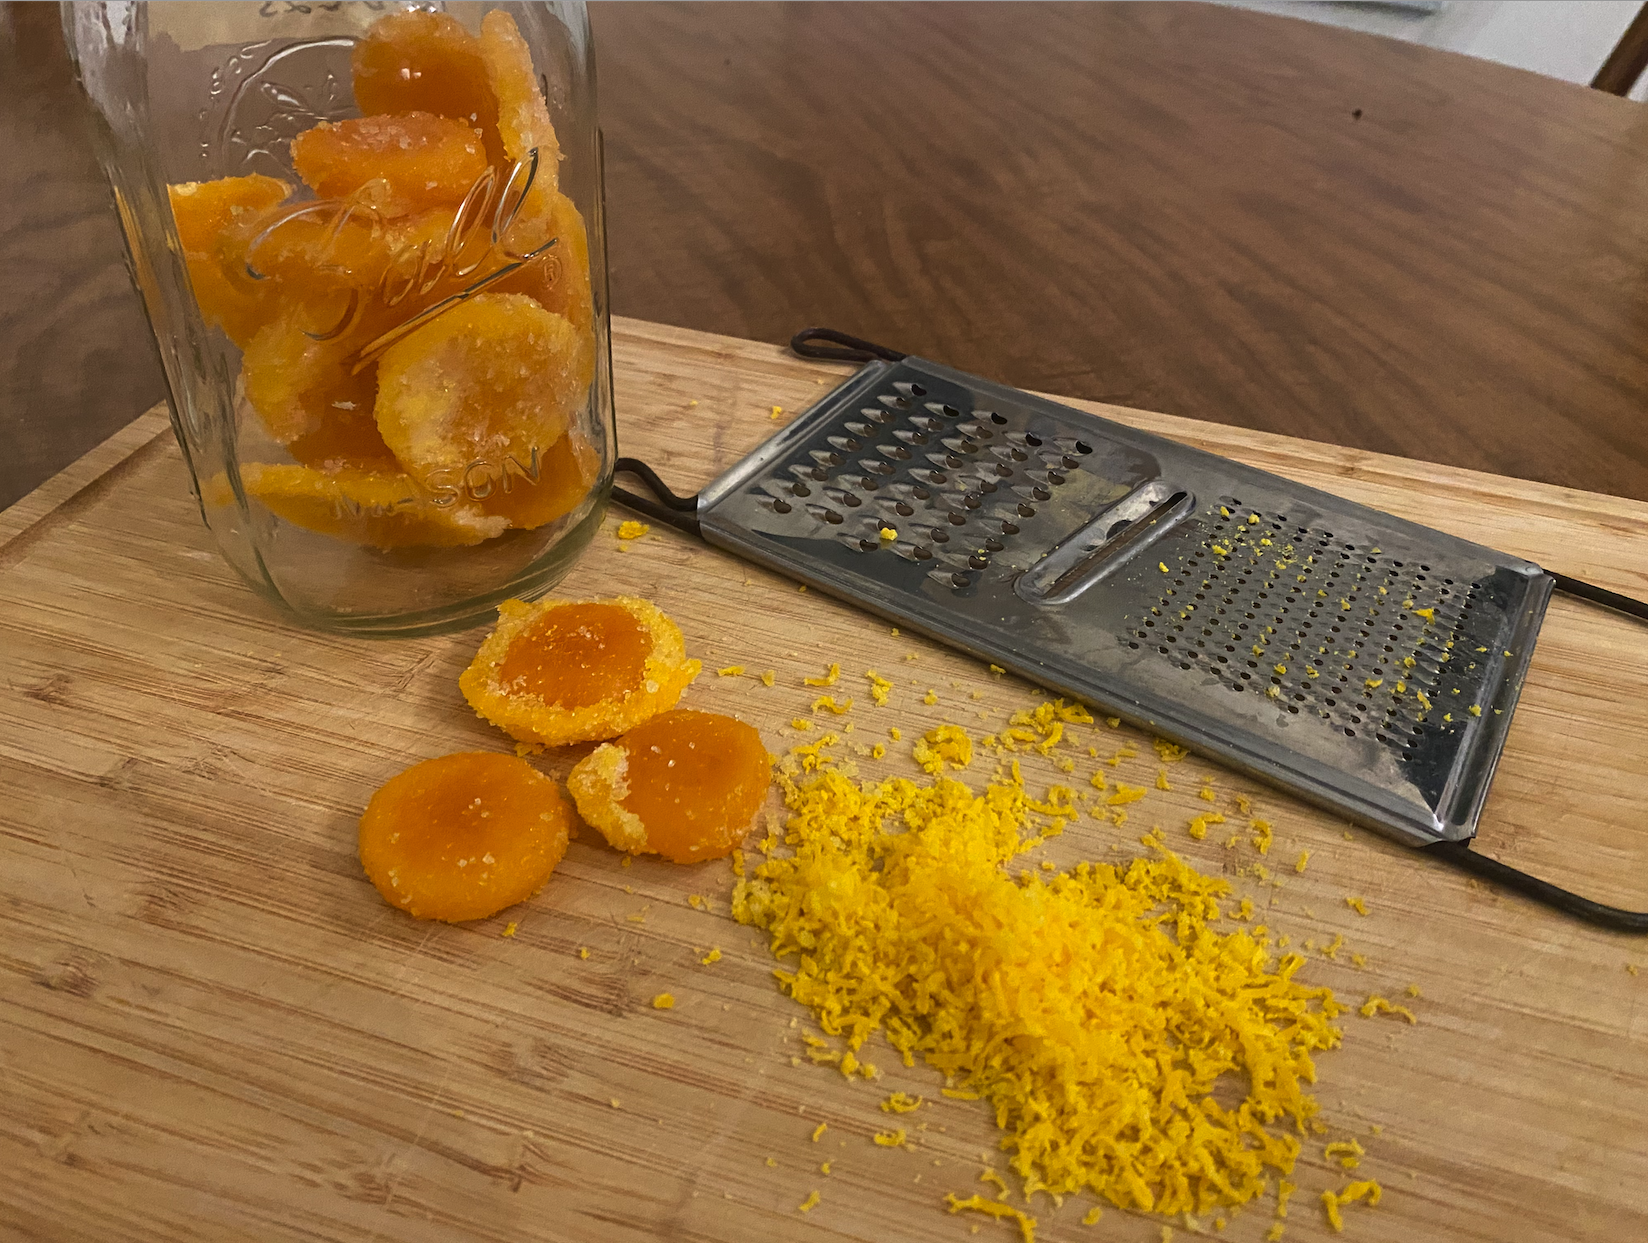
Grated egg yolks to use like cheese!
Curing egg yolks isn’t just a preservation technique; it transforms them into a rich, umami-packed ingredient with a texture similar to Parmesan cheese. This method dates back to traditional food preservation practices, allowing farmers and cooks to extend the shelf life of eggs while creating a versatile, flavor-enhancing ingredient. Whether grated over pasta, shaved onto salads, or used to add depth to soups and sauces, cured egg yolks are a farm-to-table secret worth learning.
Why Cure Egg Yolks?
Curing yolks in salt and sugar draws out moisture while concentrating their flavor, leaving behind a firm, golden yolk that’s easy to grate or slice. The result is a deeply savory, slightly tangy condiment that enhances a variety of dishes. Historically, this technique was used to preserve eggs before refrigeration, ensuring a steady supply of nutrient-dense food through lean months.
For those of us with a surplus of eggs on the farm, curing yolks is a simple yet rewarding way to make the most of our harvest.
How to Cure Egg Yolks
Ingredients:
4 large egg yolks
1 ½ cups fine sea salt
1 ½ cups sugar (or use a blend of sugar and smoked salt for a twist)
Instructions:
Prepare the Cure:
Mix the salt and sugar together in a bowl. Spread half of the mixture in an even layer inside a shallow dish.Create Space for Yolks:
Using the back of a spoon, make small indentations in the salt-sugar mixture to cradle the egg yolks.Separate and Place Yolks:
Carefully separate the egg yolks from the whites, ensuring the yolks remain intact. Gently place each yolk into its indentation.Cover and Cure:
Sprinkle the remaining salt-sugar mixture over the yolks, ensuring they’re fully buried. Cover the dish and refrigerate for 4 to 7 days. The longer they cure, the firmer they become.Rinse and Dry:
Once the yolks feel firm, carefully remove them from the cure and rinse off the excess salt under cool running water. Pat dry with a paper towel.Air Dry (Optional but Recommended):
For a firmer texture, place the yolks on a wire rack in the fridge and let them air-dry for another 24-48 hours.Store and Use:
Store your cured yolks in an airtight container in the fridge. Grate over dishes like pasta, risotto, or roasted vegetables for a burst of savory flavor.
How to Use Cured Egg Yolks
Grate over pasta or pizza for a Parmesan-like finish.
Shave onto salads for a rich, salty touch.
Add to soups or broths for extra depth.
Incorporate into sauces and dressings for a subtle umami boost.
A Time-Tested Farmhouse Staple
Egg curing is a testament to the resourcefulness of traditional food preservation. With just a few simple ingredients and a little patience, you can transform fresh yolks into a gourmet staple. Whether you’re looking for a way to use up an abundance of eggs or simply want to elevate your cooking, cured egg yolks are a must-try.
What’s your favorite way to use cured egg yolks? Let me know in the comments!